Home Staging Tips: A Room-by-Room Guide Before Listing Photos
The most useful home staging tips share one theme: reduce visual clutter, let natural light reach every corner, and make each room's purpose obvious at a glance, all before a photographer sets a tripod down. Staging is not about hiding anything about the home. It is about presenting rooms so a camera and a buyer can read them quickly.
- What are the most important home staging tips before the photographer arrives?
- Which rooms should you stage first?
- Should you hire a professional stager or do it yourself?
- How do you stage a home on a tight timeline?
- What mistakes should you avoid when staging?
- FAQ
- Key takeaways
What are the most important home staging tips before the photographer arrives?
Before anyone books a photography session, walk through the home as if you are seeing it for the first time. Stand in each doorway and look at the room the way a camera will capture it, as a whole frame, not the corner you happen to be tidying.
Start by removing anything that does not belong to the room's main function. A treadmill in a bedroom, boxes stacked in a dining room corner, or a home office crammed into a living room all confuse the eye and the lens. Buyers scrolling listing photos decide quickly whether to click into a home, and a cluttered frame slows that decision down.
Light is the next priority. Open every blind and curtain, turn on every lamp, and check for any bulbs that have burned out. Mixed lighting temperatures, warm bulbs next to cool ones, can make a photo look uneven even in a bright room. Swapping to matching bulbs across a room is a small fix with a visible payoff in photos.
Finally, walk the exterior. Clear the entry path, tuck away bins and hoses, and make sure the front door area is presentable, since it is usually the first image in any listing gallery.
Pro tip: Take a photo of each room on your phone before you start tidying, then take another after. Comparing the two side by side often reveals problems you stop noticing when you are standing in the room itself, like a cord running across the floor or a cluttered shelf just out of your direct line of sight.
If you want a structured starting point, the Listing Prep Almanac walks through a full pre-listing checklist by season and property type.
Which rooms should you stage first?
Not every room needs equal attention, and knowing where to start saves time when a listing date is already set.
The entry, living room, and kitchen carry the most weight in a typical listing gallery, since they usually appear first and get the most views. Bedrooms and bathrooms follow. Basements, laundry rooms, and garages matter less for photos but still benefit from a basic tidy if they will be shown at all.
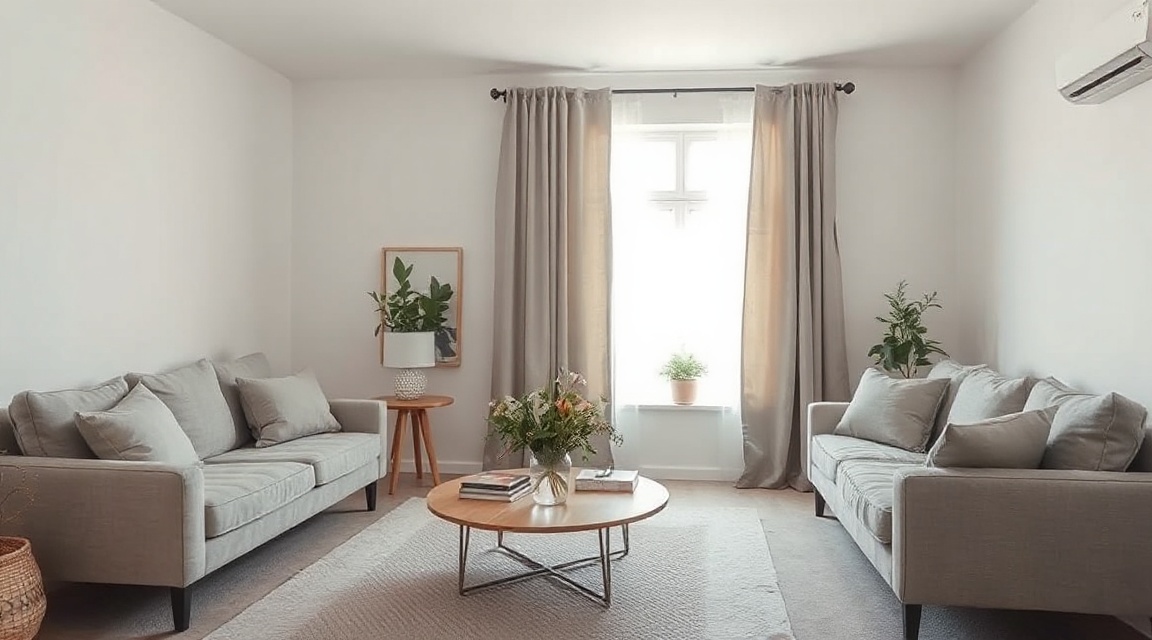
In the living room, aim for a clear sense of flow. Furniture should not block the main walking path, and side tables should hold no more than one or two objects. In the kitchen, clear countertops almost entirely, leaving perhaps one or two items that suggest daily use without suggesting mess. Bedrooms photograph best with made beds, matched linens, and nightstands cleared down to a lamp and one small object.
If time is short, spend it on the entry, living room, and primary bedroom before anything else. These are the rooms buyers linger on longest when browsing photos, and they set the tone for how the rest of the gallery is read.
Should you hire a professional stager or do it yourself?
This depends on the home, the timeline, and how much furniture is already in place. There is no single right answer, but the trade-offs are consistent enough to lay out directly.
| Approach | Time required | Best suited for |
|---|---|---|
| Full DIY staging | Several days, spread around other tasks | Sellers with flexible timelines and some furniture already suitable |
| Partial staging with rented pieces | A few days plus delivery scheduling | Homes with awkward or sparse rooms that need specific pieces |
| Full professional staging | Coordinated by the stager, often completed in one visit | Vacant homes or listings on a firm photography date |
A DIY approach works well when the existing furniture is neutral and in reasonable shape, and the seller has time to declutter room by room. It costs more time than money, and the result depends heavily on how critically the seller can view their own space.
Partial staging, where a few key pieces are rented or borrowed, suits homes where one or two rooms fall flat, such as an empty dining room or a bedroom being used as storage. It is a middle path that fixes the weakest rooms without touching the whole home.
Full professional staging suits vacant listings or situations where the photography date is fixed and there is no room for delay. A stager brings furniture, art, and accessories calibrated for the size and style of each room, and typically completes the work in a single coordinated visit.
If you are trying to decide which path fits a specific listing, Compare staging options lays out the practical differences in more detail. For sellers who want a local professional, you can find a home stager near you, including home stagers in Toronto, home stagers in Ottawa, and home stagers in Oshawa.
How do you stage a home on a tight timeline?
When a listing date is close, the work needs to be sequenced rather than done all at once.
On the first day, focus entirely on removing items rather than adding them. Clear surfaces, closets that will be shown, and any rooms serving as informal storage. Removing things is faster than arranging them and has the biggest visible effect per hour spent.
On the second day, address lighting and small repairs that affect how a room reads in photos, such as a loose cabinet handle or a curtain that will not sit straight. These are minor fixes but they show up clearly in a still photo in a way they might not in person.
On the third day, bring in any rented or borrowed pieces and do a final walkthrough room by room. This is also the point to check exterior areas again, since weather and daily use can undo earlier tidying quickly.
Pro tip: If only one day is available before photos, prioritize the entry, the main living space, and the kitchen counters. A buyer's first impression of a listing gallery is formed in the first few images, and those three areas carry most of that weight.
A written, room-by-room list handed to whoever is doing the work, whether that is the seller, an assistant, or a stager, keeps the timeline from slipping. Trying to hold the whole plan in your head across several rooms and several days is where most last-minute staging runs into trouble.
What mistakes should you avoid when staging?
Some staging mistakes repeat across nearly every listing, and most are easy to catch once you know to look for them.
Over-personalizing a room in the opposite direction is one. Removing every trace of the people living there is not the goal, and a completely blank room can feel as unfinished in photos as a cluttered one does. The aim is a room that feels lived in but organized, not a room stripped of any character.
Ignoring scale is another common issue. Furniture that is too large for a room will crowd every photo angle, while furniture that is too small can make a room look empty even when it is tidy. If a piece is fighting the room's proportions, it is often better to remove it than to work around it.
Forgetting to check reflections is a smaller but frequent mistake. Mirrors and glass surfaces can catch clutter from an adjacent room, an open closet, or even the person taking the photo, and it often only becomes visible after the image is captured.
Leaving strong seasonal decor in place for too long is another. What reads as timely in one month can look dated or out of place a few weeks later if the listing sits longer than expected.
Finally, skipping a written plan altogether tends to cause the most repeated effort. Without a room-by-room record, it is common to redo the same fix twice or miss a room entirely during a rushed walkthrough. For general guidance on preparing a property for sale, the U.S. Department of Housing and Urban Development publishes consumer-facing resources on the home selling process that can be a useful starting reference alongside a room-by-room staging plan.
FAQ
Does every room in the home need to be staged? No. Rooms that will not appear in listing photos, such as a mechanical closet or an unfinished storage area, generally do not need staging. Focus on the rooms that will be photographed and shown during walkthroughs.
How long before listing photos should staging start? Ideally staging begins several days before the photography date, so there is time to address lighting, borrowed furniture, and a final walkthrough. When time is short, a one-day plan focused on the entry, living room, and kitchen still makes a visible difference.
Can staging be done in a home that is still occupied? Yes. Occupied staging usually involves decluttering, rearranging existing furniture, and adjusting lighting rather than replacing everything. It takes more coordination with the household's daily routine but does not require the home to be vacant.
Key takeaways
| Point | Why it matters |
|---|---|
| Declutter before adding anything | Removing items has the fastest visible effect per hour spent |
| Prioritize entry, living room, and kitchen | These rooms get the most attention in a listing gallery |
| Match your approach to your timeline | DIY, partial, and full staging suit different schedules and homes |
| Fix lighting and small details early | Uneven lighting and small flaws show up clearly in still photos |
| Write the plan down room by room | A written list prevents repeated work and missed rooms |
Keep reading
For sellers
The home staging checklist, room by room
Every room in the house, in the order to do them: what to remove, what to rearrange, and what a photo actually notices.
For sellers
What to fix before selling your house (and what to skip)
The repairs buyers notice first, and the projects you should not start six weeks before listing.
For sellers
How to declutter before selling, without the panic
A calm order of operations for thinning out a house before listing: what goes first, where it goes, and how far is far enough.
Want this list built for your actual rooms?
Upload a few phone photos and the free Staging Snapshot starts the plan for your rooms. No account needed.