How to Prepare Your House to Sell: A Room-by-Room Guide
To prepare your house to sell, work through it room by room: clear clutter, clean every surface, adjust lighting, and arrange furniture so each space reads clearly in photos and in person. Start well before a photographer or agent arrives, and treat the process as preparing rooms for a camera, not just tidying for a guest. The order that tends to work is decluttering first, then cleaning, then small cosmetic touch-ups, then styling each room around its main use.
- How Do You Start When Learning How to Prepare Your House to Sell?
- What Should You Fix Before Listing Photos Are Taken?
- Which Rooms Matter Most to Buyers Walking Through?
- Should You Stage Every Room or Just a Few?
The rest of this guide walks through each stage in more detail, including a comparison of the common ways sellers get this work done and a short FAQ for the questions that come up most.
How Do You Start When Learning How to Prepare Your House to Sell?
The starting point is a slow walk-through, room by room, looking at the home the way a stranger would on a first visit. It helps to stand in each doorway and notice what draws the eye first. Often it is a pile of mail on a counter, a tangle of cords behind a television, or a row of shoes by the entry. None of these are large problems, but together they pull attention away from the room itself.
A simple way to organize this walk-through is to make a short list per room: what to remove, what to clean, what to rearrange. Keep the list plain and factual. This is also where a written staging report earns its keep, since it turns that walk-through into a clear set of instructions instead of a memory that fades by the weekend. Many sellers who work with an agent will find their agent already has a stager they use for this step. If you do not have one yet, you can find a home stager near you or look at listings for home stagers in Toronto, home stagers in Ottawa, or home stagers in Oshawa depending on where the property is.
Pro tip: Do the walk-through with your phone camera, not just your eyes. Photograph each room as if it were already going on the listing. Clutter and clashing colors are far more obvious on a small screen than they are standing in the room, and this catches problems before a professional photographer ever shows up.
What Should You Fix Before Listing Photos Are Taken?
Photos are usually the first thing a buyer sees, so the work that happens before the photographer arrives matters more than almost anything else in the process. This is not about fixing anything that requires a trade professional. It is about clearing surfaces, cleaning glass and mirrors, removing personal photos and personal items from shelves, and putting away anything that makes a room look lived-in rather than ready.
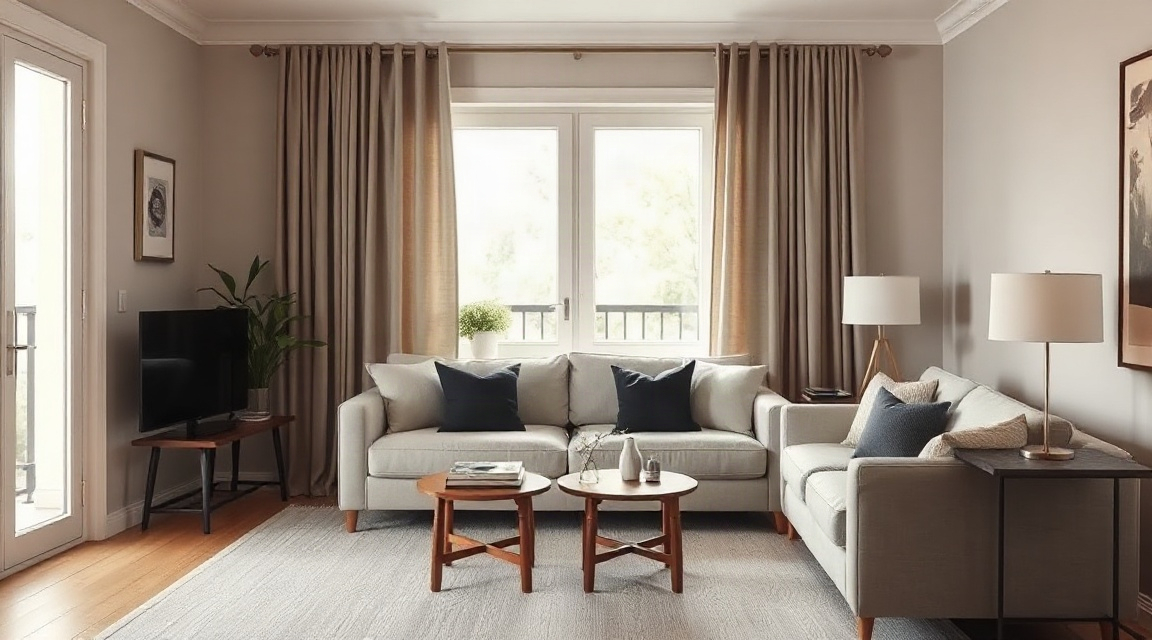
Light matters as much as tidiness. Open curtains and blinds fully during the day, and turn on every lamp and overhead fixture even if the room already has daylight. Photographers can only work with the light that is present, and a dim room photographs as a smaller, less inviting room regardless of how it feels in person.
Light fixtures and window coverings deserve a second look too. Swapping a dated lampshade or replacing a heavy curtain with something lighter changes how a room reads in a photo, without altering anything else about the room. Small swaps like this are inexpensive to reverse and easy to do in an afternoon.
Outdoor areas count too. A cleared porch, a tidy walkway, and a trimmed lawn all show up in the first exterior photo, which is often the image a buyer sees before anything else. Ten minutes with a broom and a rake can change how that photo lands.
Which Rooms Matter Most to Buyers Walking Through?
Not every room needs the same amount of attention. Kitchens and primary bedrooms tend to draw the most scrutiny, since buyers picture themselves using these spaces daily. Clearing kitchen counters down to a few deliberate items, and making beds with plain, neutral bedding, both do a lot of work for very little effort.
Living rooms come next. Furniture that is pushed against every wall can make a room look larger on paper, but it often makes conversation and movement awkward, which buyers notice when walking through in person. Pulling a sofa slightly off the wall and angling chairs toward each other tends to photograph and walk better than a room lined with furniture.
Bathrooms benefit from the same treatment as kitchens: clear counters, folded towels, and nothing personal left out. These are small rooms, so a few items out of place fill the frame quickly.
Bedrooms other than the primary can be simplified rather than fully staged. A neatly made bed and an uncluttered floor usually do more good than adding furniture that was not there before. If you are trying to decide how much effort to put into secondary rooms versus main living spaces, the Listing Prep Almanac breaks this down room by room in more detail, including which spaces tend to get the most attention during a walk-through.
Should You Stage Every Room or Just a Few?
This is one of the most common questions sellers ask, and the honest answer is that it depends on the layout of the home and how much time is available before listing. Some sellers stage only the rooms that appear in the main photos. Others go through the whole home. There is no single right answer, but the trade-offs are useful to lay out plainly.
| Approach | Time needed | What actually changes | Best suited to |
|---|---|---|---|
| DIY decluttering and cleaning | A few evenings or a weekend | Surfaces, storage, lighting, minor touch-ups | Sellers with time and a clear eye for their own space |
| Hiring a professional stager | Days to a couple of weeks depending on scope | Furniture arrangement, room styling, sometimes rented pieces | Sellers who want a hands-off, styled result |
| Using a written staging report | A single walk-through, then self-directed work | A clear room-by-room list, done by the seller or contractor | Sellers who want direction without full-service staging |
None of these paths rule out the others. Many sellers start with a report or a stager's walk-through, then do the physical work themselves over a few days. Others hire a stager for the main living areas and handle bedrooms and closets on their own. If you are weighing these options for a specific property, it can help to compare staging options side by side before deciding how much of the work to hand off.
Pro tip: If time is tight, prioritize the rooms that will appear first in the listing gallery. Buyers scroll, and many stop scrolling well before reaching the last photo. The first few images carry more weight than the rest combined, so put the bulk of your effort there.
For general guidance on preparing a home for sale and understanding the local housing process, the Canada Mortgage and Housing Corporation publishes consumer resources that cover the broader selling process beyond staging alone.
FAQ
Do I need to repaint before selling? Not always. A fresh, neutral coat of paint in a room with strong or personal colors can help it photograph more evenly, but a room already painted in a plain, light color usually does not need repainting. Focus first on cleaning and decluttering, then judge paint on a room-by-room basis.
Should I remove all furniture from a room to make it look bigger? Usually not. An empty room can be harder for buyers to picture using, since there is nothing to suggest scale or purpose. A better approach is to reduce furniture to the essentials for that room's use, rather than removing everything.
How far in advance should I start preparing? As early as possible once you know you are listing. Decluttering and cleaning take longer than most people expect, especially in storage areas like closets and garages. Starting early also gives time to live with the changes for a few days and notice anything that still looks off before photos are taken.
Key takeaways
| Point | Why it matters |
|---|---|
| Start with a slow, honest walk-through | Reveals clutter and layout issues that are easy to miss day to day |
| Clean and declutter before styling | Photos and in-person visits both show surfaces clearly, for better or worse |
| Light matters as much as tidiness | Dim rooms photograph smaller and less inviting regardless of actual size |
| Prioritize kitchens, primary bedrooms, and main living areas | These rooms draw the most attention from buyers during a walk-through |
| DIY, professional staging, and written reports each solve a different problem | Choosing the right mix depends on available time and how much guidance is needed |
Keep reading
For sellers
The home staging checklist, room by room
Every room in the house, in the order to do them: what to remove, what to rearrange, and what a photo actually notices.
For sellers
What to fix before selling your house (and what to skip)
The repairs buyers notice first, and the projects you should not start six weeks before listing.
For sellers
How to declutter before selling, without the panic
A calm order of operations for thinning out a house before listing: what goes first, where it goes, and how far is far enough.
Want this list built for your actual rooms?
Upload a few phone photos and the free Staging Snapshot starts the plan for your rooms. No account needed.