How to Stage a House to Sell: A Room-by-Room Guide
To stage a house to sell, walk through it the way a buyer would, starting at the front door, then remove clutter and excess furniture, neutralize personal items, correct lighting in every room, and arrange the remaining pieces so photos and in-person showings read as spacious and easy to imagine living in. This can be done room by room over a few days, or handled by a professional stager who plans the changes before the photographer shows up.
- How Do You Decide Where to Start With Staging?
- How to Stage a House to Sell, Room by Room
- What Should You Remove Before the Photographer Arrives?
- Should You Hire a Stager or Do It Yourself?
- How Long Does Staging Take Before a Listing Goes Live?
- FAQ
- Key takeaways
How Do You Decide Where to Start With Staging?
Most sellers try to do everything at once, which is why staging projects stall halfway through. A better approach is to move through the home in the order a buyer actually experiences it: entryway first, then the main living space, then the kitchen, then bedrooms and bathrooms, then outdoor areas last.
Start by standing in the doorway of each room and asking what draws your eye first. If the answer is a pile of mail, a stack of shoes, or an oversized piece of furniture, that is your starting point. Buyers form an impression within the first few rooms they see in photos, so the entryway and main living areas carry more weight than a guest bedroom or a laundry area.
Write down what you see room by room before you touch anything. A simple list, even on paper, keeps the project from turning into moving furniture back and forth without a plan. Some sellers use a structured checklist from a stager or realtor for this step, since it flags things an owner living in the space every day tends to stop noticing, like a crowded bookshelf or a mismatched set of chairs.
If you want a broader seasonal view of what to prepare before listing, the Listing Prep Almanac breaks down timing across the year, since staging priorities shift depending on when a home goes on the market. And if you decide partway through that you would rather have a professional walk the space with you, you can find a home stager near you rather than guessing at what to prioritize.
Pro tip: photograph each room with your phone before you start decluttering. A flat photo shows crowding and clutter far more honestly than the room does in person, and it gives you a clear before-and-after reference once the work is done.
How to Stage a House to Sell, Room by Room
Once you have a starting order, the actual staging work follows a similar pattern in every room: clear, arrange, light, repeat.
Entryway. Remove shoes, coats, and bags from sight. A single bench or small table with one deliberate object reads as intentional; a pile of daily items does not.
Living room. Pull furniture slightly away from the walls to create a sense of flow. Remove any piece that blocks a clear walking path. Keep one or two soft furnishings, like a throw or cushions, and remove the rest.
Kitchen. Clear counters down to a small number of items. Put away small appliances that are not used daily. Wipe down cabinet fronts and remove magnets, notes, and calendars from the refrigerator door.
Bedrooms. Make the bed with simple, matched bedding. Remove clothing from any visible surface. If a room is used as storage, clear at least a walking path and one clean sightline toward a window.
Bathrooms. Clear counters except for one or two neutral items. Fresh towels, folded rather than hung loosely, make a noticeable difference in photos.
Outdoor space. Sweep entry paths, put away tools and bins, and remove faded seasonal decor.
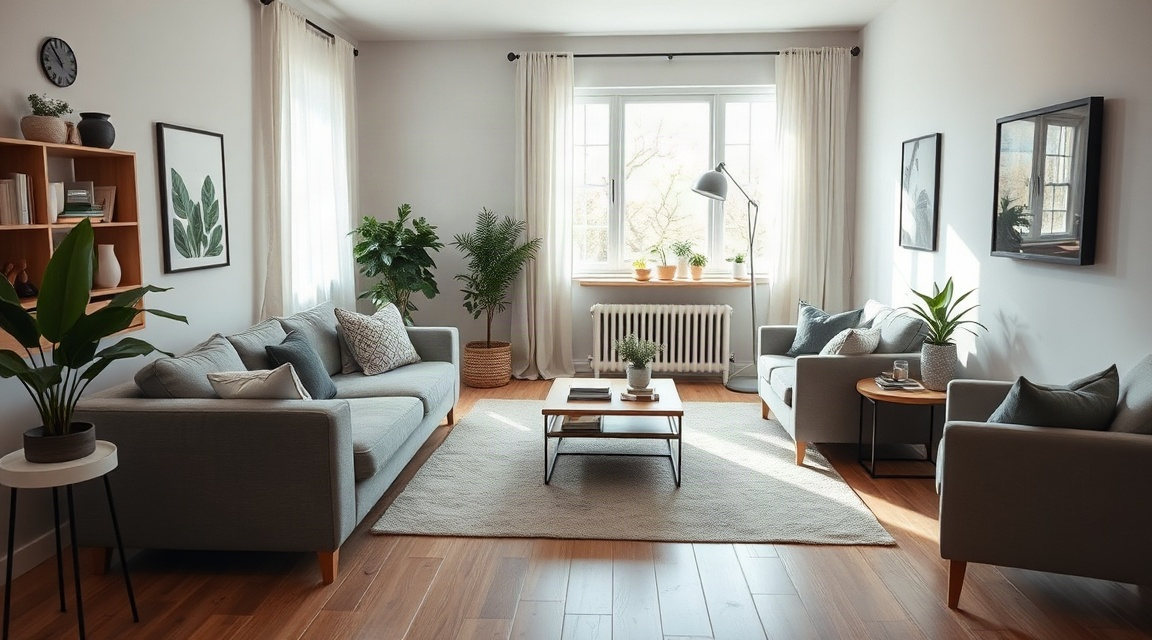
Lighting matters in every one of these rooms. Open blinds fully, turn on all fixtures before photos, and swap any bulb that reads noticeably dimmer or warmer than the rest of the room. Buyers notice inconsistent lighting even when they cannot name what feels off.
What Should You Remove Before the Photographer Arrives?
The rule of thumb is to remove anything that tells a buyer whose home this is, rather than letting them picture their own life in it. That includes family photographs, personal collections, and items tied to specific hobbies or routines that only make sense to the people currently living there.
Beyond personal items, remove anything that makes a room feel smaller than it is. This includes duplicate furniture, such as two armchairs where one would do, oversized area rugs that shrink a floor visually, and any furniture piece that blocks a window or a natural walking path.
Countertops and open shelving deserve a second look. A kitchen counter with a coffee maker, a toaster, a fruit bowl, and mail sorted into piles reads as cluttered even if each item is reasonable on its own. Clear it down to one or two items and put the rest in a cabinet.
Pet items deserve their own pass. Bowls, beds, and toys can stay out of sight for showings and photos, even if the pet itself remains in the home during the listing period.
Pro tip: pack a labeled box for each room as you go, and store the boxes out of sight rather than donating everything immediately. Staging is temporary, and you may want some items back once the home is under contract and you are packing for the move.
Should You Hire a Stager or Do It Yourself?
There is no single right answer here. It depends on how much furniture the home already has, how much time you have before listing, and whether the rooms need full replacement furniture or just rearranging and decluttering.
| Approach | Time investment | Who it tends to suit | Main trade-off |
|---|---|---|---|
| Full DIY staging | Several full days across a week or more | Sellers with flexible furniture and time before listing | Requires an outside eye to catch what feels normal to the owner but reads as clutter to a buyer |
| Consultation only, seller does the work | A single walkthrough plus a few days of follow-up work | Sellers who want direction but not hands-on help | Relies on the seller executing the plan without a second check before photos |
| Full professional staging | Coordinated by the stager, often completed before the photographer's visit | Vacant homes or listings on a tight timeline | Furniture and decor are provided rather than the seller's own, which changes how the home feels day to day during the listing |
If you are unsure which column fits your situation, the compare staging options page walks through the differences in more detail. For sellers who decide a consultation or full staging service makes sense, you can find a home stager near you to get a walkthrough scheduled before your listing date is set. Sellers in specific cities can also start with a local list, such as home stagers in Toronto, home stagers in Ottawa, or home stagers in Oshawa.
Professional associations such as the National Association of Realtors also publish general guidance for sellers preparing a home for market, which can be a useful second reference alongside whatever plan you or your stager put together.
How Long Does Staging Take Before a Listing Goes Live?
Timelines vary by home size and how much needs to change, but a rough sequence holds for most listings. Decluttering and removing personal items typically takes the longest stretch, often spread across several days since it involves decisions the seller has to make about what to keep, store, or remove. Rearranging furniture and correcting lighting usually takes less time once the clutter is gone.
Photography is the deadline that drives everything else. Most sellers and agents work backward from the photographer's booking date, which means the staging work needs to be finished, not in progress, by the day before the shoot.
A written, room-by-room plan helps here, whether it comes from a stager, an agent, or a checklist you build yourself while walking through the home. Without one, it is common to spend the morning of the photo shoot moving furniture back and forth instead of doing a final check of each room. Agents and stagers who prepare a lot of listings often work from a structured report for this exact reason, since it turns a walkthrough into a clear list of tasks rather than a memory of what needed fixing.
Pro tip: book the photographer only after you have walked every room once with your list in hand and confirmed each item is done. A same-day rush to finish staging almost always shows up in the photos as slightly rearranged furniture or an unlit corner.
FAQ
Do I need to stage every room in the house? Not every room carries equal weight. Focus first on the rooms that appear in the most listing photos, typically the entryway, living room, kitchen, and primary bedroom. Secondary rooms like a laundry area or a rarely used guest room can get a lighter pass.
Can I stage a home while still living in it? Yes, this is the most common situation. It requires more day-to-day discipline, such as clearing counters each morning and keeping personal items stored rather than left out, but it does not require moving out during the listing period.
Should I stage before or after decluttering? Decluttering comes first. Staging arranges what remains in a room, so trying to arrange furniture and decor around clutter usually means redoing the work once the clutter is finally cleared.
Key takeaways
| Point | Why it matters |
|---|---|
| Start with the entryway and main living areas | These rooms appear most in listing photos and set the first impression |
| Declutter before arranging furniture | Staging around clutter means redoing the work later |
| Remove personal and pet items from visible surfaces | Helps buyers picture their own life in the space |
| Lighting is part of staging, not separate from it | Inconsistent lighting is noticeable even when a viewer cannot name why |
| DIY, consultation, and full staging each have different time trade-offs | Choosing the right one depends on your timeline and the home's existing furniture |
| A written room-by-room plan saves time before the photo shoot | Prevents last-minute furniture moves and unfinished rooms on shoot day |
Keep reading
For sellers
The home staging checklist, room by room
Every room in the house, in the order to do them: what to remove, what to rearrange, and what a photo actually notices.
For sellers
What to fix before selling your house (and what to skip)
The repairs buyers notice first, and the projects you should not start six weeks before listing.
For sellers
How to declutter before selling, without the panic
A calm order of operations for thinning out a house before listing: what goes first, where it goes, and how far is far enough.
Want this list built for your actual rooms?
Upload a few phone photos and the free Staging Snapshot starts the plan for your rooms. No account needed.