Staging a House to Sell: A Step-by-Step Room Guide
Staging a house to sell means clearing, arranging, and lightly editing each room so photographs and in-person showings present the space clearly, in a set order that starts with decluttering, moves through repairs and cleaning, and ends with room-by-room styling right before the photographer arrives. The process is sequential because each step changes what the next one reveals.
- What does staging a house to sell actually involve?
- Where should you start in each room?
- Should you hire a stager or do it yourself?
- What should happen the week before photos?
- How do you keep the house staged during showings?
What does staging a house to sell actually involve?
Staging is the work of preparing a home's rooms so a buyer walking through, or scrolling listing photos, can picture the space clearly rather than picture the current owner's daily life in it. That sounds simple, but it covers a wide range of small tasks: removing excess furniture, packing away personal items, rearranging what stays, addressing scuffed walls or worn fixtures, and lighting each room so photos come out even and calm.
Most sellers underestimate how much of this is about subtraction rather than addition. A living room with three too many side tables reads as cluttered even if every piece is attractive on its own. Staging usually means removing about a third of what is in a room, then adjusting what remains so it sits at a comfortable distance from walls and doorways.
The other half of staging is sequencing. Doing tasks in the wrong order wastes time. Cleaning before decluttering means cleaning around piles you will move anyway. Painting before deciding what stays on the walls means guessing at color instead of testing it against the furniture. A written, room-by-room plan avoids that kind of rework, which is part of why realtors and stagers usually produce one before any photographer is booked. If you want to see what a professional staging report looks like once a stager has walked the listing photos, the Find a home stager near you directory has examples by area.
Where should you start in each room?
Work in this order, room by room, rather than trying to do the whole house at once:
- Remove everything that is purely personal: framed photographs, collections, and anything that identifies the current household.
- Clear horizontal surfaces first: counters, dressers, coffee tables. A bare surface reads as more spacious than a full one, even before anything else changes.
- Reduce furniture until the walking path through the room is obvious from the doorway.
- Address visible wear: chipped paint, marked trim, or a wobbly cabinet door. None of these need to be major projects, but small marks show up clearly in photographs.
- Reset the room's function. A guest room doubling as an office should look like one room, not two half-used ones.
- Bring in neutral soft furnishings where a room feels bare: a throw, a rug, a few matched cushions.
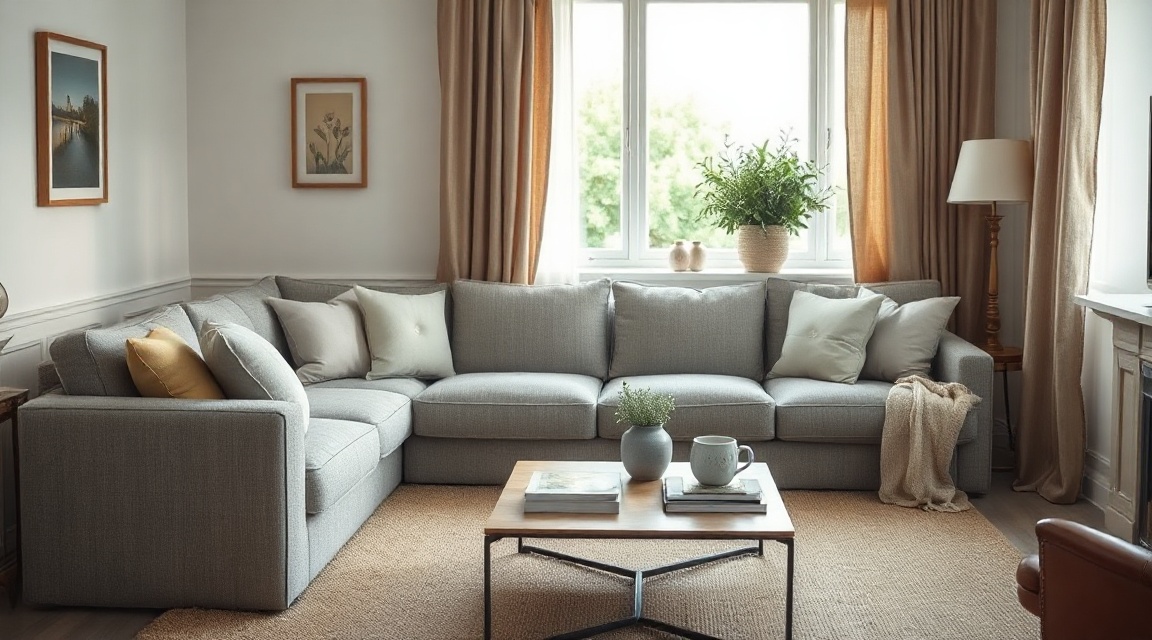
Kitchens and bathrooms usually need the most surface clearing, since they accumulate daily-use items fastest. Bedrooms need the most editing of furniture, since spare chairs and extra storage pieces tend to migrate there over time. Entryways deserve a second look because they set the tone for every photo taken from that angle.
Pro tip: photograph each room on your phone before you touch anything. A flat photo shows clutter and awkward furniture placement more honestly than walking through the room does, because your eye edits out mess that the camera does not.
Should you hire a stager or do it yourself?
Both paths work, but they suit different situations. The table below compares the two on practical points rather than on which one is better.
| Approach | Time required from you | What you control | Where it tends to fall short |
|---|---|---|---|
| Hire a professional stager | Low, mostly scheduling and access | Final say on furniture and layout choices | Less useful if the home is already mostly empty or already well arranged |
| Do it yourself with a written plan | Moderate, spread across a few weekends | Full control of pace and order | Easy to skip steps or under-declutter without an outside eye |
| Partial staging (key rooms only) | Low to moderate | Choice of which rooms get attention | Rooms left untouched can look uneven next to staged ones in the same listing |
A written plan helps regardless of which path you choose, because it turns a vague sense of "this room needs work" into a specific list you or a stager can act on. Realtors who prepare listings regularly often have a stager produce that plan before the first photo is taken, so the shoot only has to capture rooms that are already ready. You can Compare staging options to see how the do-it-yourself and professional routes differ in practice, and browse Home stagers in Toronto, Home stagers in Ottawa, or Home stagers in Oshawa if you are working with a stager local to those areas.
Homeowners selling privately, without a realtor, tend to benefit most from a written room-by-room plan, since there is no one else on the listing side checking the work before photos are taken.
What should happen the week before photos?
The final week before a photographer arrives is about finishing, not starting. By this point the decluttering and furniture changes should already be done. What is left is a shorter checklist:
- Walk each room and remove anything that has crept back onto surfaces since you cleared them.
- Check every light fixture is working and bulbs match in color temperature, since mismatched warm and cool bulbs show up unevenly in photos.
- Open blinds and curtains fully in every room that will be photographed, and check the view from outside each window too.
- Store away pet items, laundry, and anything with visible daily use, even if it will come back out the next morning.
- Confirm outdoor areas are tidy if they will be included in the photo set: cleared porches, put-away hoses, tidy walkways.
Pro tip: building in a buffer day before the photographer arrives helps regardless of which staging path you took. Something almost always shifts back into place the day before, whether that is mail on the counter or a chair pushed out of position, and a spare day gives you time to catch it without rushing the morning of the shoot.
If you are working from a written staging report, this is the point where you go back through it line by line and confirm each item was actually done, not just planned. The Listing Prep Almanac has seasonal notes on lighting and exterior timing that are useful to check against during this final week, since the right time of day for photos changes with the season.
How do you keep the house staged during showings?
Staging is not a one-time event before photos. Most homes stay staged for weeks or months of showings, which means the same standards need to hold up every time someone books a viewing. A short daily reset routine helps: surfaces cleared, beds made, bathrooms wiped down, and bins emptied before leaving the house each day.
It helps to keep a small kit near the door: cleaning cloths, a lint roller, and matches for any candles or diffusers you are using. Sellers who keep this kit close by tend to spend less time before each showing scrambling to find supplies.
Pets and staging can be a source of tension. It is reasonable to keep pet items in a single closed cabinet rather than removing them from the house entirely, as long as they are out of sight and out of smell range by the time a showing starts.
For general guidance on preparing a home for sale, including points that apply across staging and general upkeep, the Canada Mortgage and Housing Corporation publishes consumer-facing resources on the home selling process that are useful to look at alongside your staging plan.
FAQ
Does every room in the house need to be staged? Not necessarily. Rooms that will appear in listing photos or that buyers will walk through during a showing benefit most from staging. Rooms that are rarely shown, such as a utility closet, need to be tidy but not fully staged.
How far in advance of listing should staging start? Start decluttering and addressing repairs several weeks before the planned listing date. The final styling pass, including furniture placement and surface clearing, usually happens in the days immediately before photography.
Can a home be staged while people are still living in it? Yes. Most staging happens in occupied homes. It requires a daily reset routine to keep surfaces clear and rooms in their staged arrangement between showings, rather than a one-time setup.
Key takeaways
| Point | What it means in practice |
|---|---|
| Staging is mostly subtraction | Removing excess items usually matters more than adding new ones |
| Order matters | Declutter, then repair, then clean, then style, in that sequence |
| A written plan avoids rework | Room-by-room notes stop you from redoing steps out of order |
| Hiring help and doing it yourself both work | The right choice depends on time and how much of the home needs attention |
| The week before photos is for finishing, not starting | Major changes should be done well before the photographer's visit |
| Staging continues through showings | A short daily reset keeps the home ready for unplanned viewings |
Keep reading
For sellers
The home staging checklist, room by room
Every room in the house, in the order to do them: what to remove, what to rearrange, and what a photo actually notices.
For sellers
What to fix before selling your house (and what to skip)
The repairs buyers notice first, and the projects you should not start six weeks before listing.
For sellers
How to declutter before selling, without the panic
A calm order of operations for thinning out a house before listing: what goes first, where it goes, and how far is far enough.
Want this list built for your actual rooms?
Upload a few phone photos and the free Staging Snapshot starts the plan for your rooms. No account needed.